Thursday 30 December 2010

Drama Drama Drama - and Joy!

0 comments
I've been completely neglecting my blog lately. Truth be told, the reason for that is that I've been neglecting photography too. I have struggled to get motivated and inspired, and have come up with excuse after excuse as to why I haven't been shooting.

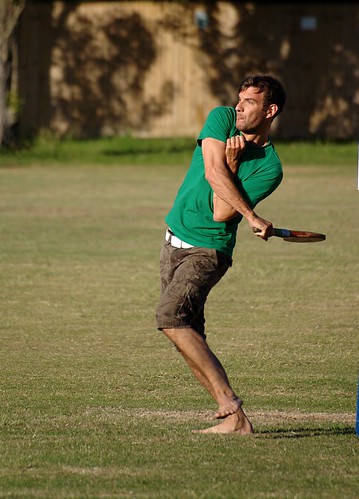
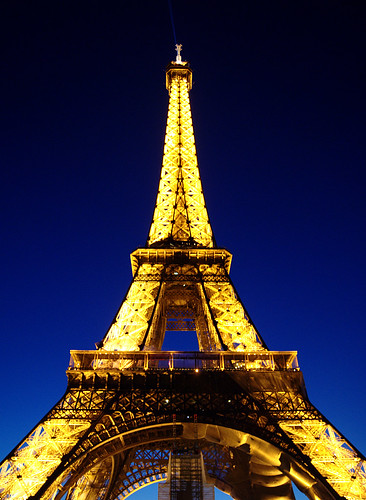
I haven't been completely rubbish, to be fair; just not very artistic. I've been to the rugby club with Ste a few times and taken some shots of the teams playing, and I've also taken some shots of my friends' babies. These sorts of shoots really pushed my little Sony a230 to its very limits in terms of digital noise though. This is an example of a night-time rugby shoot I did under floodlights:


The Sony simply couldn't produce anything I would be happy with at ISO levels of 800 or higher. This is one of many factors which led me to a big decision: it was time to upgrade my camera.

I agonised over my choice, due to budget constraints and trying to forward-plan, and eventually after researching the crap out of every camera out there, I settled on the Canon 550D. It was a big decision to jump ship to another brand, because it means the lenses I already had would not be useable and I'd have to sell those as well as the old camera.

So I whacked the 50mm lens, the Sigma zoom lens and the Sony camera with kit lens on eBay. What followed was a few weeks of frustrating hair-pulling on my part, culminating with an evening of tears swiftly followed less than 24 hours later with a day of joy. The two lenses sold pretty quickly and I got more for both than I had anticipated; £100 for the Sigma (bought for £150) and £102 for the 50mm (bought for £104).

The camera itself looked very positive to start with; the first auction was bought at the Buy It Now price of £230. Joy! But then 24 hours later an email came in from eBay; the buyer was suspicious, they had closed his account and refunded all my fees. Upon checking my spam folder I saw that he had even sent a fake PayPal email to say the funds had been paid. This was a bit of a blow and I immediately mistrusted eBay and listed the camera on the Friday Ad. Again, almost immediately a buyer emailed me saying they would take it. He lived in Bristol but was working in East Anglia so could I ship the camera for him? Sure, says I, give me the address and send the money to my PayPal account. The address comes through -- Nigeria. Forgive me but Nigeria doesn't have the best reputation when it comes to not scamming people on the internet. So that was another bust.

I advertised privately on Facebook and Twitter and through friends for a while, then got to the end of my tether just before Christmas and relisted on eBay. Luckily this time, the camera sold for £196. To say I was relieved doesn't cover it. The night before the end of the auction I had a major freakout over money and savings, and ended up crying over a plate of slightly-burned scrambled eggs at 11pm while my dear boyfriend Ste raced home from the pub to calm me down.

Anyway, it sold to a legitimate buyer who paid up straight away. While all this was going on I was shopping around hardcore, looking for a good deal on the 550D. Naturally, every Joe Bloggs who fancied a play with a DSLR had gone out and bought this model in the lead-up to Christmas. Hey, I'm not trying to be a bitch here -- the 550D has a great Auto mode and Live View so it will still be perfectly useable for all of them! Fuckers.

Anyway, in lieu of a Christmas bonus (please don't ask) my company ended up giving us each £50 of high-street vouchers. I saw that they could be used in Comet and on the Comet website the 550D was £620 so I thought I could get a pretty good price for it overall. Then the best bit of news ever: a friend of Ste's works in Comet and she could let me use her 10% discount. That would mean an additional £62 off. Amazing! I ended up paying £508 for the camera, and when you take into consideration the money I got back from the sale of the old equipment, it wasn't too big a payment.

There was a huge amount of not-in-stock drama but they ended up selling me the display model in the end. Quite unexpectedly actually, as I had gone in to pre-order one for when they were in stock. So I spent the rest of the evening alternating between delirious happiness, and confusion over the Canon menu system.

FIRST IMPRESSIONS
Comparing the Canon 550D to the Sony A230 is like comparing a strapping teenage boy to a slightly colicky baby. The baby is still cute and wonderful and you love it and all, but it doesn't really do what you want it to do, and if you try and push it too far it just collapses. Nonetheless I have some observations.

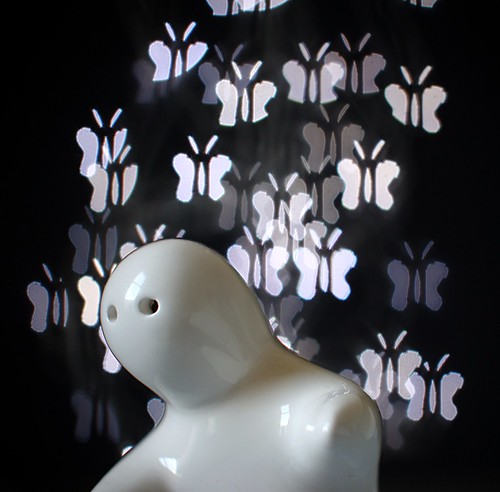
1) The Canon's rear LCD is astonishing. Like, to the point where I'm not 100% sure whether the remarkable difference in shot quality is due to the 18MP sensor or the rear LCD, and I haven't had a chance to download them to my laptop yet to look properly.

2) Canon's in-camera noise reduction makes me quiver with joy. I tested it last night on ISO1600 with the NR on "Strong" and on the LCD it looked really good. Again I need to get the shots onto the laptop to know for sure.

3) The menu system is going to take some getting used to. It's not bad, just different. Although I do have one legitimate criticism of the Canon in comparison to the Sony; on the Sony it was very easy to access the different metering options, whereas in the Canon this is buried among a large number of other options. On the plus side, it does give you the option to build your own custom menu which you can access very quickly.

4) DOF preview. Maybe I'm just being a retard but I can't see what it actually does, either on Live View or through the viewfinder.

5) Speaking of the viewfinder, again I was blown away. Maybe it's just that the dioptre has a wider adjustable range than the Sony but the clarity is astounding. The viewfinder is still pentamirror just like the Sony but it was much brighter and clearer and seems to have a wider frame coverage too.

6) The kit lens -- you have to turn it the opposite way to the Sony one when zooming which has already confused the hell out of me on more than one occasion.

7) The body itself -- not massively bigger than the Sony but noticeable enough for me, the feel of the grip in my hands is more substantial and quite frankly makes me feel like a million dollars when holding it.


Obviously it's going to be a while before I can change settings without staring intently at all the buttons with a frown on my face (I had memorised all the Sony buttons) but I can already tell I'm going to get a lot more out of this camera than I did the Sony. I'm going to shop around really hard for a long zoom lens and might even try a couple on the camera before buying this time. I doubt I'll be able to afford a faster lens than the Sigma I had before but as long as the high-ISO performance is as improved as I expect it to be, I don't think that will be an issue.

All in all I am delighted. I have a 50mm f/1.8 lens on order already and can't wait for it to show up. I have some reservations about the Canon version of this lens -- it only has a 5-blade aperture as opposed to the Sony's 7-blade, which means a chance of harsher pentagonal bokeh; also the minimum focus distance is 45cm as opposed to the Sony's 34cm which means I won't be able to get in as close -- but for £72 I can't really complain all that much can I?

I'm hoping this will reignite my passion and get me shooting a lot more again. I have a maternity shoot for a friend tentatively lined up for the end of January (although I would really like to get an off-camera flash before then if I can afford it) and generally speaking I have a few ideas of shots I can try at home, too.

Wish me luck guys!

Wednesday 22 September 2010

What A Difference A Crop Makes

0 comments
I feel like I've seen that title somewhere before. I'm probably plagiarising it without realising, so I apologise, it's not intended, blah blah blah.

Looking back over some of my older shots yesterday I realised I've unconsciously started getting into the habit of cropping a lot more severely than I used to. I've always been a big fan of bokeh and I guess previously took that to mean, I ought to include a lot of it in my shots.

DSC04920

Blammo - subject covers like 4% of the shot, and the rest is crazy blur.

In some respects a nice bit of contrasty bokeh can be kind of cool and interesting.

DSC03863

Here for example, I like the bokeh because it's quite contrasting to the subject and thus makes the subject stand out more while complimenting it at the same time.

I guess it's a matter of picking and choosing when a severe crop is necessary. All my recent hoverfly shots needed a close crop otherwise the flies themselves would have gotten lost:

DSC05573

DSC05573_crop

The only problem with this, as you can see, is that on my crop sensor camera I start to lose some detail the more severely I crop. THIS IS THE ONLY TIME I WILL COVET MORE MEGAPIXELS. If I ever manage to afford a macro lens I will be able to get much closer, fill the frame a lot more, and thus won't need to crop off as much, thus losing less detail.

I even went back over some older shots this morning and had a look at what a crop would do for them:

Busy Bee

DSC05125

What was I thinking?! I MUCH prefer the new crop. Also I think I've grown out of that phase of adding texture layers to everything in existence, too.

A crop can make a huge amount of difference to your composition as well as helping you cheat a little and get more fake focal length out of your lens. I'm going to experiment a lot more from now on and try not to include bokeh just for the sake of bokeh.

I've said "bokeh" wayyy too much in this post now. I'm just gonna go crawl back under my rock.

Thursday 9 September 2010

Aperture Masks (and an OMG moment).

0 comments
I've had a really good day today; a bunch of smaller but wonderful things all happened throughout the day to make me smile. You can't argue with that sort of karma can you?

Anyway, this week a post went up on the Digital Photography School site showing a how-to video on how to create "custom bokeh" by the way of aperture masks. I won't go into details on how I did it, as the article/video does a much slicker job than I possibly could.

How To Create Custom Bokeh

This technique, I am sure, is old hat, however it was the first time I had seen anything like it, and from the video it looked so easy I had to give it a go.

My bits and bobs are crudely cut and taped together. I used a sheet of black card as my backdrop and my Christmas lights for the bokeh. I ended up having to arrange everything on my bed as it was the only place with the right light. Really I ought to try and set myself up a little mini-studio or something. I also ought to get myself an off-camera flash.

BUT I DIGRESS.

So I looked at the video, and at my teeny weeny little cut-out shapes, and thought, this can't POSSIBLY work. Surely my viewfinder would be all hazy and even my subject would suffer as a result.

Well, through the miracle of SCIENCE, it does work, although don't ask me to explain how. Something to do with light refraction and all that jazz. Anyway, these shots are very rudimentary until I have the time and inclination to set something up a little better, but nonetheless I think this is incredibly cool and I can't wait until Christmas when I can go out and buy a bunch of tacky coloured lights and try some other setups.

DSC05675

DSC05681

DSC05671

Yeah, those are salt and pepper shakers, you gonna make something of it?!

Anyway, it was incredibly easy to do although the star and butterfly shakes created enough weirdness at the front of the lens that a) auto-focus didn't work, and b) it distorted what I saw enough that I wasn't even sure whether I had the subject in focus on manual (turns out I did but out of sheer luck I think).

What I'd like to do is commandeer a corner of the spare room and get some really big bits of card that I could stick various swatches of coloured paper on. Ultimately I'd like to get an off-camera flash but I wonder whether a diffused desk lamp might suffice in the meantime. Anyway, with this setup I could set up my tripod and manually focus before putting the mask on, would be able to adjust the lights behind on-the-fly, and I could generally be a lot more creative.

Watch this space I guess?

THE OMG MOMENT

I don't need to mention yet again what a big fan of Ree Drummond's I am. She runs regular photography assignments on her site wherein she sets a theme and asks her readers to submit their shots which comply with this theme. She'll pick five groups of semi-finalists, from which she'll then pick a group of finalists and eventually a winner. I always submit a couple of shots even though mine are NOTHING compared to some of the amazing work other people submit. This week#s theme was "Funny"; I dutifully submitted a couple of shots and forgot all about it.

Only to log on this morning and find that she'd selected one of them as a semi-finalist.

I had a major freakout. I don't expect even to be picked as a finalist, let alone as a winner, but to be noticed at all among the tens of thousands of submissions Ree gets each time she puts a contest on. It also is wonderfully gratifying, to know that something I shot is worth the attention of a total stranger. I literally couldn't stop smiling all afternoon.

I feel inspired today. I hope the weather is reasonable this weekend, but even if it isn't I might give the aperture masks another play. As long as I'm shooting it's all good. :)

Friday 20 August 2010

Sweet Discovery!

0 comments
In my previous post I mentioned that I really wanted to get Photoshop Elements because of the huge wealth of preset actions you can get on the web, which apply predefined edits to a shot to give it the look you want.

My main reason for wanting to get PSE was because the available scripts I had found for GIMP were limited and underwhelming. Well, I did a little creative Googling (and by "creative" I mean, I Googled "GIMP scripts" and looked further than the top couple of results) and came across tons of really amazing scripts, and curves presets. I've been happily playing with them a lot, although the results have been quite mixed purely because I only have a limited number of shots on my laptop. Still, I've found them really fun and cool.

The presets all behave differently depending on what shots you use them on. The only shots I have available to me right now are all nature-based with a lot of greens, so the results have been similar, but I think if I ran them over some more diverse pictures I would find the output quite different and cool.

So, some examples.

This is the original (with just some levels and sharpening applied):

DSC05580

Not bad; the composition, colour and bokeh are all fairly pleasing.

First I ran a "cold" curves preset. Curves presets are easy to create -- you just to the curves adjustments you want then you can export the settings into a file which is saved for later. You can see on this there's a more bluish tint to things:

DSC05580_Cold

This is a "warm" curves preset:

DSC05580_Warm

This curves preset is called "Forest" and is intended to bring out the greens. I think for this shot it's interesting but doesn't work perfectly; there is already a lot of green in the shot and this just pushes it a tad too far:

DSC05580_Forest

This curves preset is called "Purple Hue". Again doesn't work great on this particular shot but I think it could be really interesting on portraits or a more minimalist shot:

DSC05580_Purple

As well as curves presets there are also more complicated scripts you can get, which are more sophisticated edits. This one is called "Reminisce Warmth" which adds a quite contrasty vintage feel:

DSC05580_RemWarmth

"Soft Muted" which desaturates, adds a gaussian blur layer look and again some more contrast:

DSC05580_SoftMuted

And this is a "National Geographic" script, which is intended to give portrait shots a very high-contrast, slightly washed-out look; doesn't blow me away on this shot but I ran it over a portrait I had knocking around and it looked pretty good:

DSC05580_NG


I've had a lot of fun looking through these and the many other presets I downloaded, and seeing how they work. I can't wait to try them on some more diverse work. If anyone is interested, all of these curves presets and scripts were picked up from deviantART.

Thursday 12 August 2010

Wish List

0 comments
I don't think there's a single photographer I know who wouldn't get extravagant with their gear if cost wasn't an issue -- even those who have expensive equipment already. Long-term goals for me would include a full-frame camera and expensive lighting setups, but I also have shorter-term desires which I hope to be able to afford within the next year or so.


Sigma 105mm f/2.8 Macro Lens

I've always felt like I prefer the close-up style of shooting. There's something about being close enough to really *feel* your subject that appeals to me. The latest outdoor shoot I did has strengthened that feeling. Bottom line is, I'm an amateur, and as enthusiastic as I am, I'm only shooting for myself. I sometimes think I should challenge myself to do something different like landscapes, but then I think -- feh, as long as I enjoy what I do it doesn't matter if it's challenging or not.

This lens has some great reviews and while performance-wise it still falls a little short of the similarly-priced-and-focal-lengthed Canon EF 100mm f/2.8 Macro lens, well, I don't have a Canon camera, and the Sony 100mm f/2.8 Macro is generally reviewed as having very similar results to the Sigma, but costs almost £200 more.

Cost: £300 from Onestop Digital
Timeframe: Short-medium term depending on whether I can save up or clear some space on my credit cards
Level of desire: HIGH, damnit.


Photoshop Elements 8

Given that the full version of Photoshop CS5 costs somewhere in the region of £600 and is intended for professional graphic artists and photographers, Adobe also have a "lighter" version of the product for amateurs and non-commercial users called Elements.

Now, I currently use GIMP for most of my photomanipulation and I won't lie -- it's awesome. However I am a lazy, lazy person, and a feature that's available in both CS5 and Elements is something called "Actions" -- essentially from what I can gather, you hit record, do a bunch of edits, then hit stop and you can save that process as a preset Action to use again with ease. GIMP utilises a similar system with written scripts, but as it's opensource the creation of said scripts seems to be a little geeky and codey, and way beyond my capabilities. The best part about the Elements actions is that they can be saved as a little data file which you can then share with other users. GIMP also has this feature but looking at the script registry they just don't seem to float by boat all that much, and the ones I have used have been lacklustre at best.

Yeah, so essentially I want Elements so I can take edits other people have done and apply them to my own work. Whateva! Some of the actions you can get out there look fantastic and again, I'm not a purist -- if they make me happier with my shot then I want to use them.

Pioneer Woman has a bunch of actions available for free on her site which I think look really, really cool. And luckily for me, Elements 8 is totally affordable, so I can justify the cost. Anything that Elements can't do (rumour has it there are no layer masks?) I can run through GIMP, and as I understand it Elements has a built-in RAW converter which will make my whole process much easier.

Cost: £56.90 from Amazon.
Timeframe: Virtually immediate -- probably as soon as I get paid this month.
Level of desire: Extremely high -- I can't wait to see if I can make something of some of my more "blah" shots by running an action or two over them.


Sony HVL-F42AM External Flash

I have posted before about on-camera flash and how much I detest it. My hatred has until now left me feeling completely underwhelmed about any flash setups, but a little research goes a long way, and I know now that a simple external flash would be extremely useful in the long-run. I don't see myself ever getting into expensive and elaborate lighting setups just for a hobby, but I think one versatile external flash with all the necessary accessories will end up in my kit in the not-too-distant future.

Cost: - Less than £200 from Amazon.
Timeframe: Medium-long term. It's cheap enough that once my higher priorities are out of the way I can make a decision about it and not have to save extensively.
Level of desire: Medium. I haven't yet been at a point where I've gone "oh MAN I wish I had a decent flash" but I suspect as I start to branch into macro photography I will start to feel the need for it more (simply put, if I stick my lens really close to a subject, just by sheer physics there won't be as much light coming in, so a softly diffused flash may prove useful).


Neutral Density/Graduated Neutral Density Filters

A bit of a mixed bag this. These types of filters typically go hand-in-hand with landscape photography, especially the graduated ones. In short, neutral density filters allow you to slow your shutter speed without blowing out the shot; they stop a certain amount of light coming into the camera, so in order to achieve a properly-exposed shot one has to slow the shutter speed right down. This can give some stunning motion captures like the waterfall in the above link.

Graduated ND filters are filters which have the grey, light-stopping effect at the top of the filter, which graduates to clear at the bottom. They typically come in a square shape and have to be attached to the lens with a filter holder (the whole setup is then known as a "filter system" such as the Cokin brand sell) and thus can be moved up and down to suit the composition of your shot. They are used for landscapes. When shooting landscape typically DSLR cameras do not have enough dynamic range to expose the sky and foreground both correctly -- if you expose for the foreground, the sky will be too blown out and bright, but if you expose for the sky, the foreground will be dark or almost black. In some instances this can create a great silhouette effect, but if you are going for a dramatic landscape shot, ND Grad filters are really the only way to achieve this.

Personally as I've decided not to venture into landscapes for now, my desire for filters has decreased somewhat. Screw-on filters like a standard ND come in a set size and without really knowing what I'd use it for, there's no point in me buying one to fit my 18-55mm kit lens if I'm eventually going to swap it out (they aren't cheap!). As for ND Grads -- as you attach the holder to the lens, the adapters themselves which come in different sizes are very cheap and you don't have to replace the filters -- but there's just no point for me right now.

Cost: Ranges from around £50 for a standard ND screw-on, to £200 for a full filter system.
Timeframe: Longterm.
Level of desire: Medium-low -- not completely low purely because I know I want to try landscaping at some point in my life at which point I will want filters with a passion.


Sigma 10-20mm f/4-5.6 wide-angle lens

For landscapes. If I start to shoot landscapes this is the lens I want -- it has great reviews, is highly popular and in the affordable price range.

Cost: Less than £340 from Onestop Digital
Timeframe: Longterm.
Level of desire: Medium-low.


Obviously aside from the above, if money were no object I would probably ditch all my current lenses and camera body and would buy a Canon 5D MkIII full-frame camera (and all the lenses again) and a really expensive, heavy-duty tripod. But the above items are all ones I believe I will be able to buy myself within the next couple of years at least. :)

Saturday 7 August 2010

OH CAMERA, let's never fight again!

1 comments
Short post filled with joy.

Today I was determined to get out with my camera for the first time in ages which hasn't involved an actual event of some kind. It was so worth it. We're into August now and while it's still summer, it's slowly winding down. There's the smallest hint of autumn in the air. Not much, mind -- I went out in bulky shoes and a cardigan and was sweating unattractively within minutes.

Anyway, I am so glad I went out. I want to go out again. Also as an aside, I have been berating myself for not being more diverse; shooting almost exclusively nature close-ups and the like. Well, today I figured, why the hell not? I could branch out into landscape eventually but it's difficult and requires the use of expensive filters to get evenly exposed shots of sky and foreground... the concept does intrigue me and I love looking at landscapes, but right now it's just not my thing. I want a macro lens. OH GOD I want a macro lens.

Anyway - the output of today's shoot!

DSC05575

There was something in the air today - the bees, (and fake bees like this one, I think) were so busy chowing on nectar and gathering pollen and doing all those wonderful things bees do, they didn't seem to mind me getting all up in their grill. ALL of today's shots were taken with manual focus, which is nothing short of a miracle - firstly, that I managed to capture these shots given how generally clumsy I tend to be, and secondly that the buggers stayed still long enough. I lucked into a few of them, without a doubt. Especially this one, which is my favourite of the day:

DSC05562

There's a really pretty wild sort of area in the park which is fairly sparse in the winter and beginning of spring. I wasn't expecting all the life that was there when I sauntered through today.

DSC05573

DSC05592

Heck, the insects were getting in my shot even when I wasn't going for it!

DSC05605

Today was a good day -- I feel very happy about the results, more inspired to shoot again, and as always, pining for better equipment.

Some day you will be mine!

Friday 6 August 2010

Bad, bad photographer.

1 comments
I've been bad.

I'm still stuck in this funky black hole where I have no motivation to pick up my camera. It's weird, because I still enthusiastically peruse the usual websites every day, I still assimilate information and knowledge as much as I can, and I still drool over equipment I can't afford. But when it comes to picking up the camera, I fall flat.

Unless I have something specific to shoot.

Stool Ball

DSC05239

Look, if you don't know what stool ball is, don't even worry about it. It's like a cross between cricket and rounders, but it's only played in my home county of Sussex.

A couple of weeks ago my company put on a stool ball team-building event where we all went down to the local playing fields, ate barbecue, drank beer and played stool ball. Well, I say "we all" -- some of us played paparazzi. And, as always, learned a lot.

I approached this event with the same general plan as I had when shooting the tennis in Paris -- I was using my long zoom lens, which isn't very fast, so I knew I would have to up the ISO to get the faster shutter speeds I needed. It all started at about 6:30pm, too, so I also knew the shadows would be getting longer and conditions would be darker and darker as the evening wore on.

Unfortunately due to the rapidly darkening conditions, the dark t-shirts people were wearing, and the dark backgrounds (trees/bushes etc) I had to up the ISO to around 800, which resulted in some especially noisy shots:

DSC05387
Jim Edgar bowls - f/5.6, 1/500, ISO800.

I shoot RAW+JPEG and the above is an output of a processed RAW shot. The SOOC JPEG is nowhere near as noisy as this. I don't know why it turned out this way -- perhaps the levels contrast adjustment and sharpening I did enhanced the noise.

Either way, when I uploaded the shots and showed them to my boss the first thing he said was "these are very grainy" which made me feel pretty crappy.

Luckily the brighter ones turned out pretty well, considering:

DSC05259

DSC05284

There were a couple of other weird moments that evening for me. I think I've mentioned this before, but normally I feel quite self-conscious with my camera, right up until the moment I start shooting, after which I feel very relaxed and happy. This wasn't the case that night. At one point I overheard someone behind me go "Jess is company photographer is she?!" in a really patronising way which really embarrassed me. And at another point, after everything was winding down, someone was playing with my cam and struggled to get the auto-focus on my 70-300mm lens to lock in, due to the dark conditions -- I overheard him turn to someone and say "this is shit". I should have delivered a rather large "FUCK YOU" in the form of my fist in his face, but again I was really embarrassed. So after the noisy shots, the patronising "photographer" comment, and the guy-doesn't-understand-how-AF-works remark, I went back home and buried my camera again.

Since then I have done a very small amount of shooting. I took my camera to my friend Tom's birthday party in which everyone played rounders and some other sports-day-esque activities like egg-and-spoon races and sack races. In another reflection of how lazy I've been, the pictures aren't even on Flickr.

I've tried to rekindle my love of photography generally by getting involved in a subset of the community called iPhoneography. There are a lot of cool apps which apply filters and effects to iPhone shots which give them vintage looks. iPhoneography is fun but doesn't provide the same level of satisfaction to me as shooting with a DSLR and processing the pictures myself. I guess at some point I'll make a post of some of my iPhone shots.

I did have a couple of moments where I thought I would have something to look forward to -- a potential maternity shoot, and a local wedding photographer who was looking for an assistant -- but neither of them have gotten in contact with me so it looks like it came to nothing.

Anyway, my plan is that this weekend I will force myself to take out my camera. I've instructed Ste to SHAME me into it in whatever way he can. Unless it's raining all day I absolutely MUST go out -- even if it's just to the park for more flower shots. Anything to get me shooting again.

*sigh* Wish me luck I guess.

Monday 28 June 2010

First update in a while - London Zoo.

1 comments
Sorry for the delay between posts -- simply put, I haven't been out shooting much at all since the Colour Spectrum project. In fact, the only time I really properly picked up my camera was when we went to London Zoo for my birthday.

I haven't uploaded all my pictures from the day yet, as it's tough to sort through them and find the really good ones, considering a) most of them were shot through a sheet of glass which caused distortion and reflection, and b) I forgot my longer zoom lens so the animals in big open enclosures were all shot at 50mm -- way too far away :(

Anyway, I have uploaded a few from the day and this is what I have:

Llama

Haha, just look at that guy's underbite. I was torn between trying to get in close to shoot him, and trying to stay out of the spit radius.

Bird-eating Spider

My loving, wonderful, thoughtful and attentive boyfriend Ste beckoned me over to this cage, pointed at this hideious beast and said "check that out!" then scarpered while I was going "BLARGH, EWW, BURGH, YUCK."

Bug

Cool bug but I should have closed the aperture a teensy bit to help with the DOF.

Yucky Spider

DISGUSTING thing, just horrendous. There were about eight of these in one cage and actual flies in their webs. This thing reminds me of the hybrid human-alien Xenomorph from Alien: Resurrection. Just made my skin crawl.

Cool shot though.

I also captured tons of shots of reptiles, amphibians, gorillas, lions, a komodo dragon, and generally everything you expect to see in a zoo. It might seem a little quaint to go to the zoo for my birthday but we had an amazing day and were thoroughly knackered when we got home.

In other news, Ste bought me a tripod for my birthday which I have yet to try out yet, but one experiment I really want to try out, is to take the whole kit out on an evening when the tide is out just as it starts to get really dark -- what I'm aiming for is the kind of smoky/milky water effect you get from long exposures, but without filters the only way I can achieve this is if there is very little light out. Birling Gap, which isn't far from me, has quite a rocky beach when the tide is out, so that's where I'm going to go. The tide and sunset are perfectly synchronised on Saturday but naturally I am busy that night so I don't know when else I'll be able to get out.

Oh, and also I was one of the lucky (read: sad) people who queued for and got their hands on an iPhone 4 on Thursday so that has been occupying me a fair bit recently. :P

Monday 7 June 2010

Weekend Mini-Project -- Colour Spectrum (with some trippy edits)

0 comments
This post is going to be a little different to my usual ones, in that it will be image-heavy and include brief "how I did it" descriptions focusing on the post-processing and not the camera settings.

For the most part I like to keep my post-processing fairly simple. I adjust the levels, a little in curves, sharpen and crop and that's about it, apart from the occasional monochrome (aka "mono" -- black-and-white) conversion.

But sometimes it's fun to play with the trippier side of photo editing. I use an open-source program called GIMP which is totally free and a decent, powerful alternative to Adobe Photoshop, which is insanely expensive. GIMP includes most of the tools that Photoshop does which means there's a lot to learn and play with, but if you know how to use it is just as effective, in my opinion.

So, after leaving my camera to collect dust for a week after coming back from France, I decided I needed to set myself a little project to motivate myself a little. While bigger, long-term projects like the 365 one served to demotivate me through too much pressure, mini-projects seem to be quite fun and satisfying. And the one I set myself this weekend seemed on the surface to be an easy one -- I just needed to take seven shots, incorporating each colour of the spectrum in whatever way I saw fit.

Naturally nothing is as easy as it seems and despite myself I was quite busy this weekend -- in the end I only went out once just for half an hour and didn't actually shoot every colour, so I had to get a little inventive to complete the project.

Red

A very simple edit here which I will cover in more detail in a later post. First I adjusted the levels, then made a copy of the shot and converted it to mono. I copied and pasted the mono shot as a new layer on top of the colour one, then added a layer mask. Then I selected the brush tool, and selecting the colour as black I painted over the postbox, essentially erasing the mono layer to reveal the colour underneath. Once this was done I flattened the image and saved.

Orange

I had this exact edit in mind when I took this shot. The house itself was very well kept and clean-looking, but that carrier bag outside was a weird juxtaposition, and that it happened to be the colour I needed for my Orange shot was just perfect. I did the same edit process as above for this shot, then in addition added a vignette -- again something I will cover in a later post.

Yellow

The only edits I did here were the basic levels and sharpening. I could have done more with the composition of this shot I think.

Green

Again just levels and sharpening. This shot didn't occur to me as the "green" until I opened my mind a little -- the subject is the bee but the green is still the dominant colour. Also incidentally, bees are really erratic motherfuckers and I don't know how people are able to successfully shoot them with any regularity.

Blue

This little piece of confetti almost didn't get shot at all -- I saw it out of the corner of my eye near the town hall on my way home, and was going to keep walking but made myself stop, change lenses, turn back and shoot. The edit I did here was a weird one -- I used the Filter Pack in GIMP to add a blue filter to the shot without completely recolourising everything. I don't know how it works and it was very experimental from my perspective.

Indigo

Indigo is a weird colour isn't it? To me, indigo and violet are just fancy-pants way of saying "purple". Anyway, the original of this shot is a very different colour -- the bush itself is a reddish-maroon colour. I went into the Hue-Saturation tool, selected the Red channel and changed the hue until it was a suitable blue-purple colour.

Violet

Nothing but levels on this, not even any sharpening. I actually really love this shot.

So there it is -- my first successful mini-project! It's always good to discover new, weird and wonderful processing techniques even if you don't intend to use them too much.

Friday 4 June 2010

Paris and Roland Garros - the Learning Experience

0 comments
It goes pretty much without saying that I had an amazing time in Paris. The weather was good (apart from a day of rain at the tennis -- malheureusement), the company was wonderful, the apartment was bijou, the food was... well, cheesy -- all in all I had a blast.

I definitely approached this holiday with a slightly different perspective than I did last year's. While I was ultimately there for the tennis (and I made sure my photography didn't get in the way of that) I certainly had a few other things going on in my mind.

1) Would my new lens really get me as close as I wanted?

Ok so I wasn't peering up the players' nostrils like some of the pros and their amazing lenses would have been, but considering we were up in the stands I was surprised and delighted at the zoom level I achieved.

DSC04663
Roger Federer (aka future husband)

DSC04431
Rafael Nadal (aka Imogen's future husband)

Much to Imogen's delight the zoom was enough to get some very pervy shots of Rafa, changing his shirt, picking his shorts out of his bum as he does, etc. So yes, the zoom level was sufficiently awesome.

2) Would I be able to find the right settings to get decent shots?

I had a feeling going in that shooting in Shutter Priority wouldn't quite cut it in the sporting conditions. The lens I took is not a fast lens -- fully zoomed in the maximum aperture is only f/5.6 -- so in order to get the shutter speed I desired I needed to turn up the ISO. I have a pathological fear of noisy shots but as it was still fairly light and the court was textured enough to hide the noise, I went for it anyway, and shot in full manual -- the first time I'd done so for an extended period of time.

DSC04356
Fernando Verdasco and his chiselled, chiselled abs

What was most interesting was that in the conditions it was really difficult to see the shots on the LCD to determine whether they were correctly exposed. So, another first for me, I changed the preview screen to show the histogram instead. As long as the histogram was either evenly spread, or at least bunched up towards the middle, I was happy with the exposure.

And the third "first" for me was that I used the camera's metering mode properly for the first time. Either on the LCD or within the viewfinder, the meter shows me the exposure bias for that shot with the settings I was using: if it was 0.0 or thereabouts, it was correctly exposed -- between 0.0 and +2.0 was over-exposed, and -2.0 to 0.0 was under-exposed. Using this I was able to adjust my settings "on the fly" much more, which was important on the days when there was occasional cloud cover -- you'd be surprised how many adjustments have to be made when the sun goes behind a cloud.

DSC04711
Federer in the sun - f/5.6, 1/1250sec, ISO100

DSC04732
Federer in cloud cover - f/5.6, 1/800sec, ISO400

What this experience happily taught me is that, if the conditions demand it, I absolutely am able to choose the correct settings on the fly and end up with a perfectly satisfactory shot. Me being me, I am still not 100% happy with them, but I know it's more of a limitation of my budget -- could I afford faster lenses, I'm confident I would have taken crisper shots.

3) Would the DSLR with optical zoom lens be that much different from the digital zoom of the high-end point-and-shoot cameras?

Fuck yeah it would.

DSC04675
Alejandro Falla clay-sliding en route to losing to Federer

NON-TENNIS SHENANIGANS

We did go sight-seeing a little too -- our apartment was less than 10 minutes walk from the Eiffel Tower so we went to have a look on our first evening there.

Let me just state for the record that the Eiffel Tower by day is pretty shocking. It's very rusty, they've built a massive skate ramp at the base of it, and generally speaking it's a little kitsch.

However at night, it becomes something else altogether -- they light it up (of course) and if you catch it when there's still a little blue in the sky it really does look amazing.

DSC04283

You can see the skate ramp bottom-middle -- it's a shame really, but they built it for some world record free-fall skating attempt, so maybe they'll dismantle it?

So I'm gonna toot my own horn again. Given that we were just wandering around, I did not use a tripod for the above shot, which was taken in manual mode at a shutter speed of 1/4sec. This is extremely slow. Given the speed I am very, very pleased with myself for getting this result hand-held. Likewise, the following shot was taken at 1/3sec, even slower than the above:

DSC04278

My fear of noise, which is much more obvious on dark shots, prevented me from upping the ISO and shutter speed accordingly. So I just grasped the camera in one hand, the lens in the other, breathed out and pressed down.

DSC04261

For this shot I was experiencing some severe vertigo looking up at the structure -- I had to go down on one knee to avoid falling over backwards -- so the fact that I got a clear shot at 1/5sec is, to me, fairly remarkable.

On the whole, taking my camera with me gave the trip an additional angle from which to enjoy myself, and I really did. I feel like I've learned a lot from a practical perspective, not just in theory, which ultimately is more valuable in the long run.

On the flipside, I was so surgically attached to my camera for that week that I haven't picked it up once since I got back -- oops!

Wednesday 19 May 2010

Camera Sensors and the Megapixel Myth

0 comments
A topical subject -- I've just had my sensor professionally cleaned, which led me to research the difference between dust on the sensor, dust in the viewing optics and dust on the lens... which in turn led me to research the specifics of what a sensor is, the different types of sensor you get, and the difference in quality from one to the next.

DUST OMG

If you peer through the camera viewfinder and see dust, then the dust is NOT on your sensor. It will, 99% of the time, be on the reflex mirror, focusing screen or inside the viewfinder itself.


If you consider the diagram above, you can see that any dust on the illustrated path of light will show on the viewfinder. Generally speaking, while this is annoying, it's not the end of the world and won't show up on your images.

If you are seeing little dust spots on your image, it is probably dust on your sensor. Technically speaking it could be on your lens, but it would take a sizeable bit of dust on the lens to show in the final image, due to the way the focusing works. With every lens there's a minimum distance that it will focus at and anything closer gets blurrier and blurrier - well imagine how blurry a tiny dust spec would be right on the front lens element, and you get why it's unlikely to be a dusty lens if you can see it on the final image.

So, dust on the sensor. If you can see it on the viewfinder it won't show on the image - similarly if it's on the sensor you won't see it on the viewfinder. To check for dust on your sensor, mount a lens which can be set to 50mm or longer, close the aperture right up (f/22 or thereabouts), and shoot either a uniform blue sky, or a neutral white/grey surface like a wall. You might be able to see the spots on the LCD screen, or just pull the image off and look at it on your computer. It should be easy enough to spot -- if not, then you clearly have nothing to worry about. :)

Your camera's sensor is the equivalent to the film in film photography. It's the bit that is exposed to the light to generate the image (to continue the analogy further, if the sensor is akin to the film, a RAW image is akin to the negative, and the final JPEG is akin to the print). As such the sensor is incredibly sensitive and really if anything permanent happens to it, your camera is FUBAR.

Cleaning the sensor is a delicate matter. I googled and googled the phrase "sensor cleaning" to hell when my camera had dust, and most more experienced photographers will say it's something you can do yourself as long as you're careful and purchase the right tools. DISCLAIMER: You MUST get specialist tools to clean your sensor and you MUST follow the right procedures to avoid permanent damage. The general procedure involves first using a rocket blower to blast any loose bits of dust off the sensor -- once this is done, you can use a wet-clean technique to remove any bits which are stuck on. It's really important that you use the right tools for this - the right cleaning solution, the right swab -- if you mess up you could cause permanent damage to your sensor.

I could go into all the details but let's face it -- I am a klutz at the best of times. The other night, for example, I dropped a totally NOT hot casserole lid onto the worktop (didn't break thank god), then less than five seconds later, dropped my iPod on the kitchen floor. So when I realised I had dust on my sensor, I sent my camera off to be cleaned by a professional. It wasn't that expensive, and even though I was without my camera for three days, as someone who would have almost definitely ruined the sensor had I cleaned it myself, it was well worth it.

Sensor Size, Crop -vs- Full Frame, and Mega-Pixels

This fantastic post on the Photography Forum explains it much better than I can, PLEASE read it through, but I'll attempt to give my own summary perspective on it a little too.

Basically put, the larger your sensor is, the more light will fall on it. If there is not enough light, the sensor signal must work harder to detect what little light is there, which results in a "noisy" or "grainy" shot. You can manually boost the amount of light that hits your sensor by opening the aperture (a faster lens will help with this), slowing the shutter speed, or upping the ISO, which will make the sensor more sensitive to light -- but will still result in digital noise.

A full-frame camera will contain a sensor which is the equivalent size to a 35mm camera. As a brief aside I'll explain what that means to your field of view. If you're ever looking at lenses and see a phrase like "50mm on a crop sensor, which equates to 80mm in 35mm format", what they're referring to is the effective field of view; a shot taken at 50mm focal length on a crop sensor camera will produce the same result as a shot taken at 80mm on a full-frame camera. So you can extrapolate that to mean that 50mm on a full-frame camera will give a wider field of view.


Anyway, back to the point. The benefit of a full-frame camera is a wider field of view and better low-light performance. The flipside of that is how crazy-expensive they are. Nikon's biggest full-frame model, the D3X, retails at around £5000, whereas even the most expensive crop sensor cameras will usually come in less than £1000.

Now, on to what's known as the MEGAPIXEL MYTH. This is one that I was extremely gratified to read about, as it is kind of annoying hearing people bleat on about how many megapixels their camera has as if that makes it better - something I felt even before I was interested in photography.

A few weeks ago a friend of ours was considering switching away from iPhone to another phone model, and gave the reason that the camera that came with it had 14 megapixels. I still pride myself to this day that I was able to dissuade him from this before I even read up about the megapixel myth, purely by following the logic through in my own mind.

Enough boasting from me. The megapixel myth basically states a fallacy that more MP = better image quality. This is not necessarily true! My DSLR has a modest 10.2MP. Heck, Nikon have a full-frame camera model, the D3S, which has just 12.1MP. The truth is, a smaller sensor has a "sweet spot" when it comes to MP resolution, and if you try and cram more MP into a smaller sensor, you're going to end up compromising the image quality by creating sometimes-unacceptable levels of digital noise. So to Dan I said, it doesn't matter if your phone has a 14MP camera, the sensor is way too small to produce a decent-quality image.


Megapixels do matter to an extent, and especially in two particular areas: cropping and large-scale printing. If you're going to crop a huge amount out of a shot, more MP will allow you to do so and maintain image quality when the shot is scaled up to a bigger size. Similarly, if you're going to take a shot that's meant for, say, a huge wall poster or a billboard, I would imagine the MP count would be important there too.

There's a great article from the New York Times which explains the Megapixel Myth and also some genuine tests that were done to disprove it.

I hope this post has helped you to understand your camera's sensor a little better. Needless to say, the bigger sensor you can afford, the better the image quality will be, and megapixel size is NOT the effective comparison tool you think it is when considering which camera to buy next.