Friday 30 April 2010

Southampton and Middle Farm

0 comments
I mentioned in a previous post that I went to Southampton this week with my sister and mother. Tasha had a university "interview" that day. I say "interview" but it was really just a group presentation, then they looked at her portfolio for an hour and didn't actually talk to her. So, we had some time to kill, and Southampton Solent overlooks a really beautiful park in the city centre. Naturally, I had my camera with me and was in seventh heaven.

DSC03857

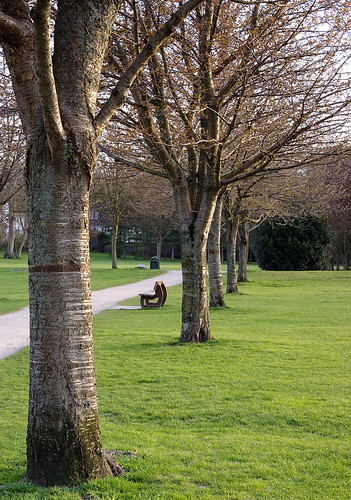
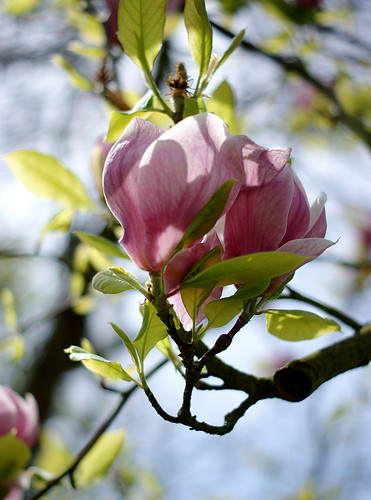
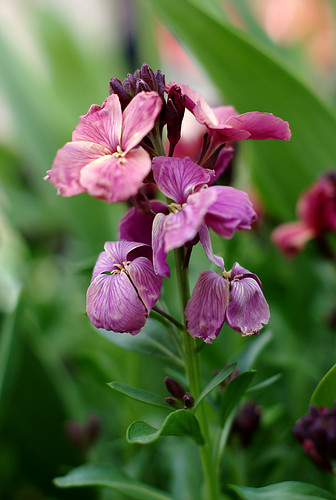
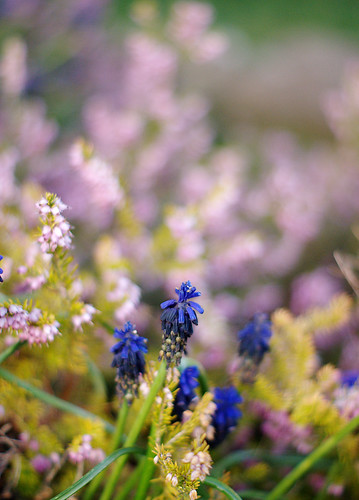
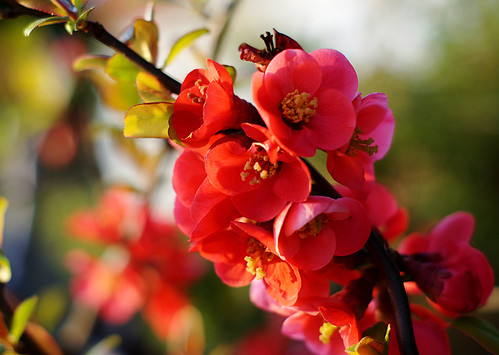
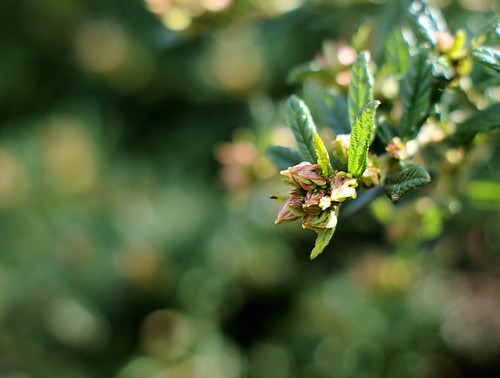
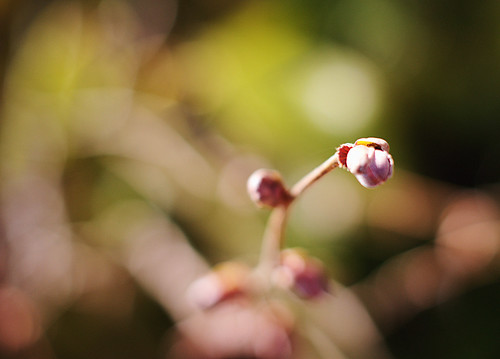
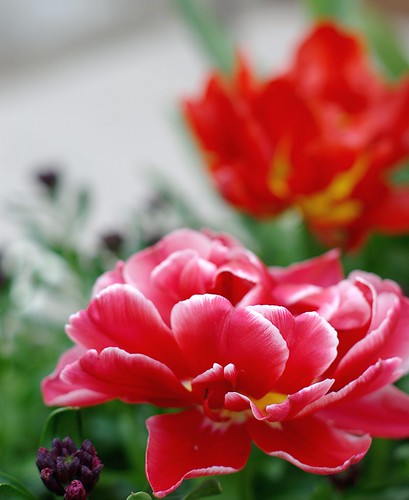
Colour everywhere! At times it was very cultivated and bordering-on-unnatural colour but considering Eastbourne has no parks like this and it was the hottest day of the year so far, my heart soared.

DSC03863

DSC03847

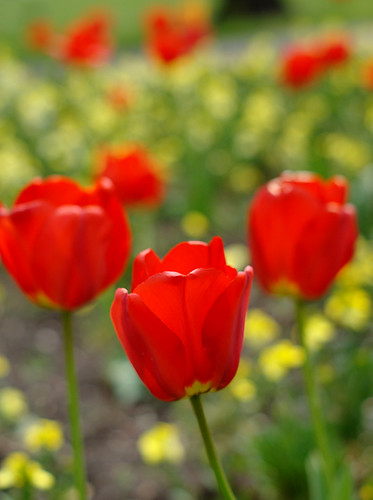
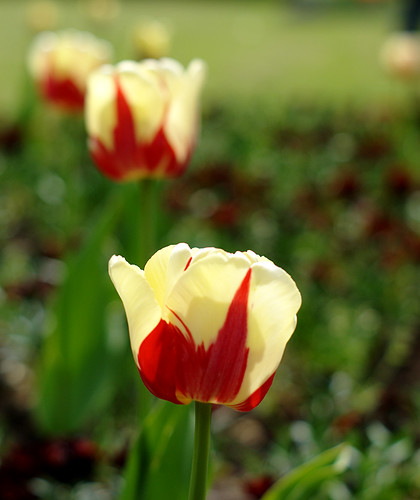
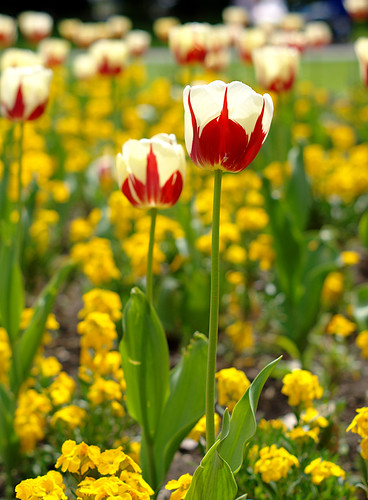
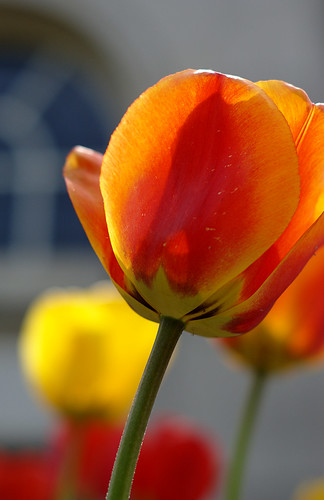
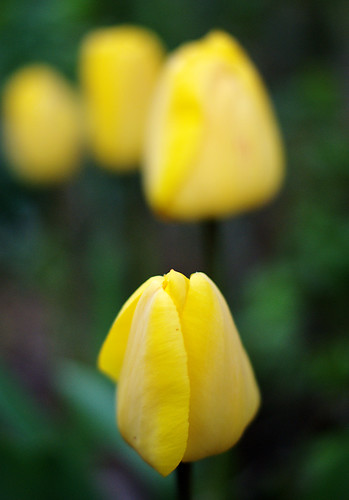
Everywhere tulips. Yellow, red, yellow-and-red, orange, pink... It was a real treat for the senses.

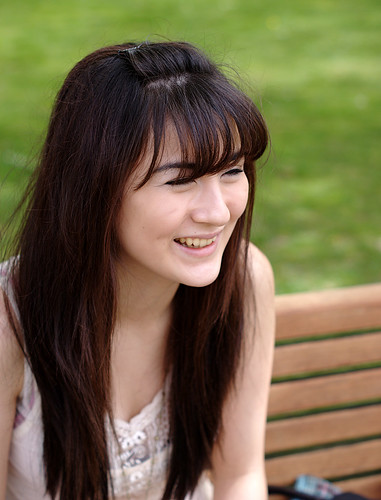
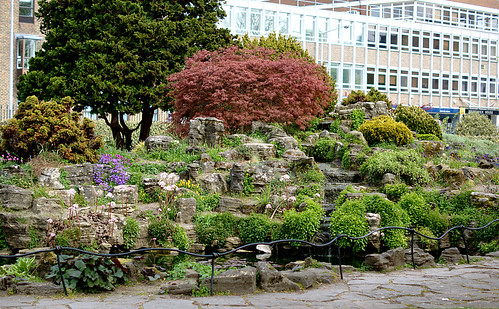
The park itself was extremely well-kept and clean, and being right opposite the university, I have no qualms in saying that it had a MAJOR influence on me telling Tasha I preferred this university to any other she'd seen.

DSC03844

DSC03846

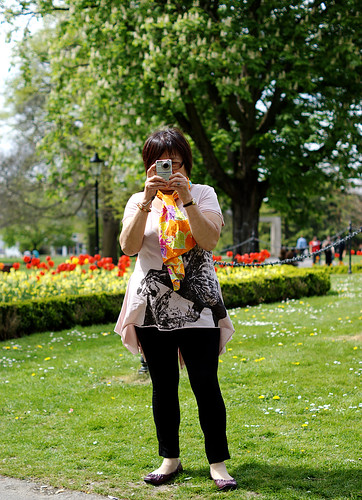
Even my dear, sweet mum got involved. :)

Mum

Once we were finished it was still relatively early, so we decided to make a stop off at Middle Farm on the way home.

Barn

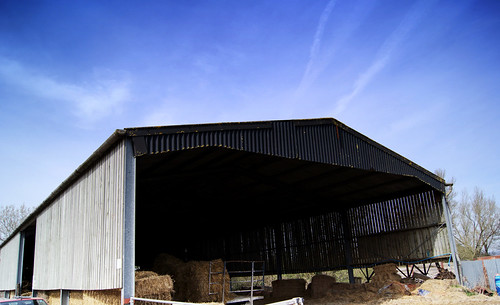
Middle Farm is a great little place which is open to the public and has a shop with tons of locally sourced fresh meat, fruit and vegetables, their own cider and perry barn, livestock wandering around, a plant and herb area... it's a really great place for a day out. You can see the shop, cider barn, plant area and a lot of birds without having to pay, or you can pay just £3 to go through to the main farm area and see the sheep, goats, cows etc.

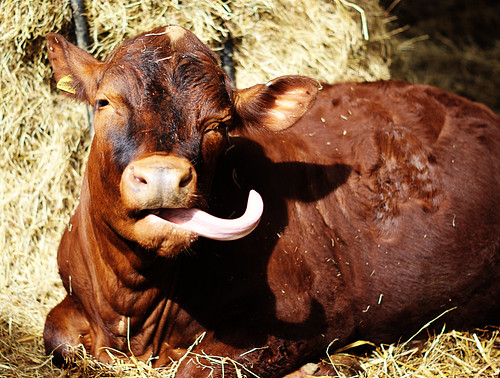
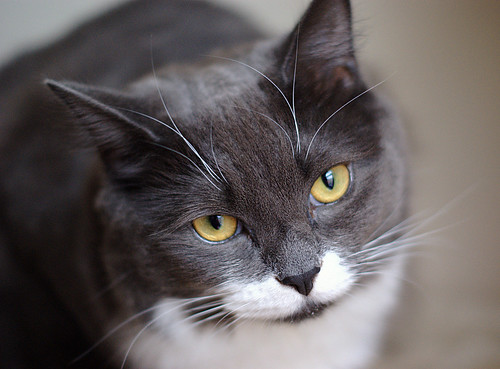
It being spring and all, the cows have all foaled and we got to see a couple out front.
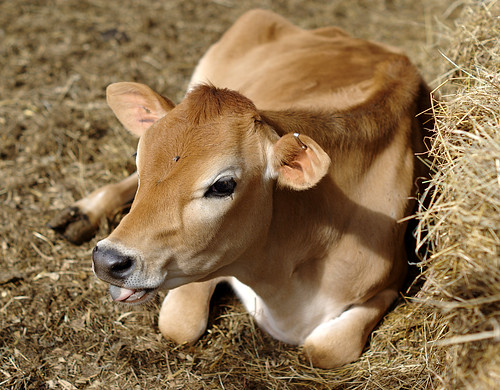
DSC03872

Hi cutie!

We also had the pleasure of seeing some of the peafowl pruning on a nearby wall.

DSC03891

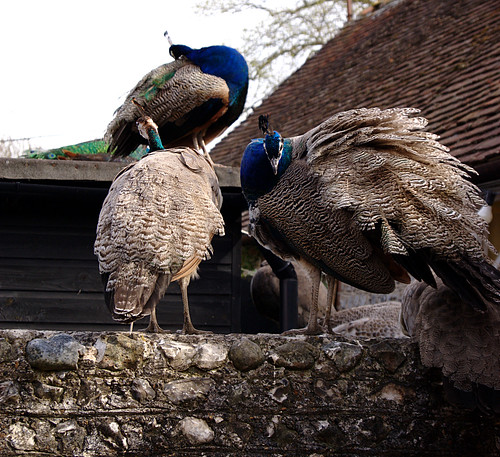
These are all peahens but you can see the peacock just in the background.

It's weird - I've always been aware of the generally polygynous nature of most animal species but seeing it in the flesh was quite hilarious. As well as that peacock and his hens, we also came across this fella:
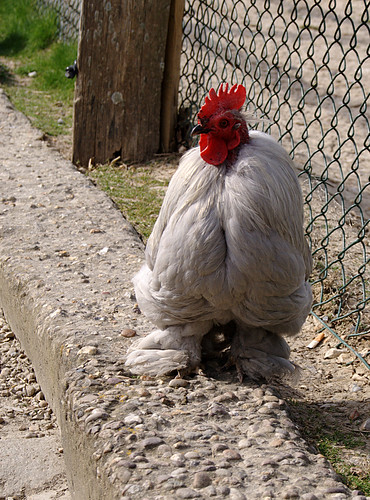
DSC03908

And his harem:

DSC03900

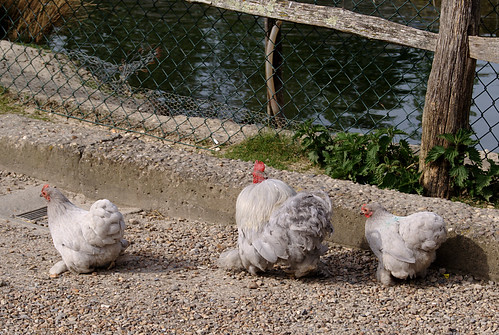
This shot really doesn't cover it -- he was bowling around with no less than FIVE hens following him. Also, HOW HILARIOUS are these chickens? Look at their feet! It's like they're wearing slippers! I wanted to take one home but Ste would have eaten it.

As well as the chickens, there were a lot of ducks:

DSC03931

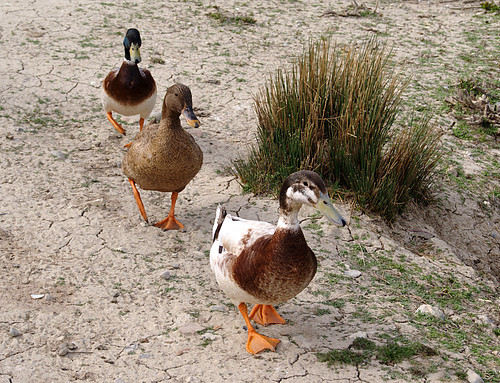
(check out homeboy bringing up the rear - what a pimp)

And geese:

DSC03920

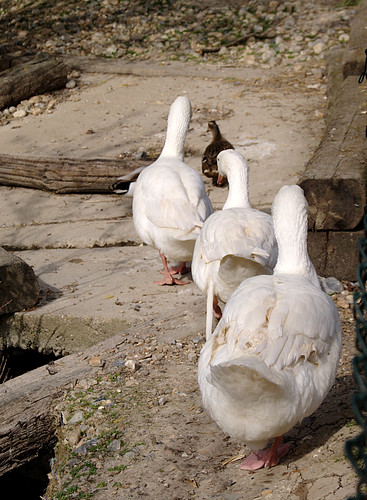
I've got to say, when these geese came rocking up it was like watching a cliché scene from some mafia movie. They all walked in a line, REAL slow, marching along, and the ducks scattered before them. At one point they passed right in front of us (separated by a fence thank god) and the front fella stared at me so intently that I was too scared to put my camera up in case he went for it. Just imagine these huge, majestic birds marching reeeaaaal slow by you, smaller birds fleeing (hum the Imperial March if it helps), then the Godfather stares you out for a good fifteen seconds... and I'd like to see you manage a better shot than this:

DSC03918

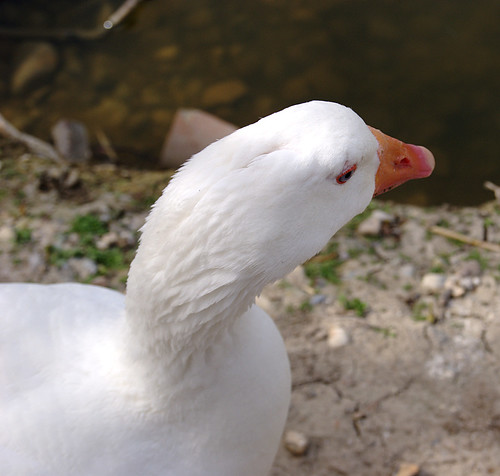
That's right - I waited for the goose to break eye contact before I moved. I'm hardcore.

Thursday 29 April 2010

How much do I love Spring?

0 comments
A lot, that's how much. And the main reasons?

LIGHT

Aside from it being lighter much later now, the colour of the light is ludicrously pretty. Just as evening starts to fall, the light turns this beautiful orange-gold which makes shooting a real pleasure.

38/365

DSC03711

DSC03852

It's a lot of fun to shoot things from different angles and incorporate the fall of the light into the composition of the shot. If I had Seasonal Affective Disorder then the springtime light would be the ultimate cure.

COLOUR

Ahh, springtime flowers. Bright colour is the answer to everything. Yesterday my mum, sister and I were in Southampton so Tasha could go see a university there, and I was overwhelmed by bright and beautiful colours everywhere I looked.

DSC03864

DSC03856

DSC03860

MOOD

Everyone is happier when we move out of the gloom of winter and into the joy of spring.

DSC03871

Even the most miserable teenagers we know. :)

42/365

Friday 23 April 2010

Jargon: Key Words

0 comments
I was just reading over the last couple of posts I made and realised I'm jabbering away about RAW and post-processing terms like "Unsharp Mask", all terms which will pass a new starter by completely. I will cover the whole RAW vs JPEG debate in a later post, as well as some of the basic post-processing techniques, but let me just fill you in on the basics of what some other terms mean.

Shooting in RAW

In basic terms, if someone says they are shooting in RAW they are referring to the file format of the shot in the camera. A RAW file is the digital equivalent of the negative in 35mm cameras; it captures the raw data of the shot without applying any processing whatsoever. This means that every possible pixel of data within the parameters of the settings you have chosen, will be captured and made available to process with.

On the flipside, shooting in JPEG, your camera will apply a certain amount of processing to a shot as soon as it is taken; most notably it is a "lossy" file format, and the automatic compression applied to the file within the camera makes much of the detail unchangeable in post-processing. For example, if I underexpose a shot slightly, with the JPEG file I will be limited as to what detail I can recover in the darker areas; with RAW there is a lot more that can be recovered, which is handy for me as my camera tends to shoot a little dark anyway.

RAW files themselves are not viewable as a preview or thumbnail and you have to install special software to view and edit the images. RAW files also tend to be anywhere from two to six times the size of a JPEG file.

I shoot RAW+JPEG -- it uses a huge amount of space on my memory card and hard drive, but it enables me to pick and choose via the JPEG preview which shot I want to edit and publish.

I really need to clear some of those old shots out, actually.

Post-Processing Terms

For starters, in future posts you may see me mentioning "PP" -- that refers to post-processing, which is adjusting the shot in software such as Photoshop or, in my case, GIMP.

Unsharp Mask -- confusingly-named tool for sharpening an image. This method is preferred to any generic "Sharpen" tool you may have as it offers more control.


Levels -- the Levels tool is for adjusting colour and contrast using the image's histogram as a guide. I'm not totally au fait with the science behind it, but it involves moving sliders around to get the desired contrast and level for the overall image or for each colour channel.


Curves -- similar to the Levels tool, the Curves tool shows you the image histogram with an initially straight diagonal line running through it, which can be adjusted as needed to increase or decrease the various tones of the image. For example if you pull down the lower end of the line, and pull up the higher end, you are darkening the dark tones and brightening the bright tones, thus adjusting your contrast.  Again, you can choose each colour channel for more specific results.


Both Levels and Curves are tools I use instead of the standard Brightness/Contrast tool, as they both offer a lot more control over how bright and dark you make the different tones.

Focal Length

Focal length is a term used to describe the length of a lens. It is always shown in millimetres and describes what level of zoom it offers. Exactly what the distance is measuring is something a little too sciency for me but you can find a very wordy explanation at Wikipedia.

The human eye sees roughly at a focal length of 45-50mm. The longer the lens, the further in it will zoom. Anything shorter than 50mm is described as "wide-angle", it offers (obviously) a wider angle of vision than the longer lenses.


Incidentally I am on the verge of dropping £150 on a 70-300mm zoom lens. Purchasing everything on my Amazon Wish List will require me to win a small fortune on the lottery at some point.

That covers most of the basic stuff I prattle on about.

I think?

Minute Differences

0 comments
What a difference orientation can make to a shot. I learned this totally by accident while idly snapping in my mum's garden the other day.

I'd say up until that point, some 99.9% of my nature shots had all been shot in Landscape orientation. It was just the way the camera naturally went to my face. The results were all fine, nice, good even, but I was getting totally bored with nature shots. In fact, I started writing up a post just the other day on how uninspired I was feeling.

Red Leaves
DSC03523
DSC03560

These shots are all fine. Good, even (by my own meagre standards); certainly I would happily show all of them as part of my portfolio. But I felt like it was all getting kinda samey.

Then by total accident I shot this at my mum's:

DSC03621

Ignore the processing I've done on this for a sec and just think about the composition. It's not a huge change; you have the subject in neat focus and the bokeh is nice and smooth, same as the others. But somehow I feel like the change from Landscape to Portrait has made the shot a little more interesting, a little more pleasing to the eye, a little more inclined to make you stop and look.

Of course I didn't realise this until I came to process the shots the next day; needless to say I got kind of excited and went straight to the park to test my theory.

DSC03672
DSC03679
35/365
DSC03681

Well whaddaya know! I love all four of these. Maybe other people looking might just think "feh, more flowers, they all look the same" but to me the difference, as minute as it may be, is enough to renew my love for photography and the myriad ways one can capture the world's beauty.

Incidentally, who know tulips were so darn photogenic?

Also I just want to throw in there that all of the shots on this page were taken with manual focus. I am extremely pleased with my progress in learning how to control every setting on the camera to get exactly the shot I want -- in close-ups, auto-focus just doesn't do it for me -- and the fact that my shots are continuing to get sharper is happy-making. In fact for most of the last set of shots I did, I didn't even have to run the Unsharp Mask in post-processing. Hooray!

Wednesday 21 April 2010

German Shepherd, and the Importance of Manual Mode for Animals

0 comments
My parents have a beautiful German Shepherd unfortunately named Kane, and yesterday when I went to visit I caught a few shots of him messing around in the garden.

DSC03617

I wanted to close the aperture down a little (around f/5) to increase the depth of field and get more of the dog in focus, however as always I stayed in Aperture Mode for the first few shots. Even though it was a bright and lovely afternoon, his fur is mostly dark, so my camera picked up on this fact and slowed the shutter speed down to around 1/40th.

DSC03634

Here you can see around his snout there is a little motion blur. This is why it's important to always be aware of your settings; to me, the shutter speed sounded fast enough that I didn't even consider it until I looked at the LCD after taking the first few shots.

The general rule of thumb with shutter speed is to try and keep the speed faster than the focal length you're working at. So with my 50mm lens I should at least have been at 1/50th, or 1/60th to be on the safe side. Even at 1/40th, the dog was moving around so quickly and erratically, there was motion blur.

I realised this eventually and switched into Manual mode, stopping down to around 1/80th:

DSC03637

Similar pose, virtually no motion blur; much better! I also opened the aperture by half a stop to f/4.5 to compensate so the shot wasn't too dark, and the beauty of shooting in RAW is that to an extent, as long as you don't go mad with it, you can correct the exposure a little after the fact.

In retrospect I would still prefer to have stopped the shutter speed down even more, to about 1/100th, maybe bumped up the ISO to 200 to compensate, and taken a step back from the dog to help with the depth of field. We live and learn and it's good for me to think about these things even after it's too late, so I know better for next time.

34/365

NOM NOM NOM.

Monday 19 April 2010

On and On We Go

0 comments
I got over my nervousness and ended up doing some maternity shots for Sarah the other week. As it happens, she is a wonderful model, it was a very relaxing atmosphere, and I discovered something about myself that day too: when I look through the viewfinder, I lose all self-consciousness about what I'm doing. I kept the camera glued to my face most of the time which enabled me to find some great angles of her as she turned to talk to her sister or boyfriend:

DSC03078
Posted with permission

I had no qualms in telling her to "HOLD IT!" and overall they were really happy with the shots.

Another great thing was again, how much it taught me about post-processing. I had a minor disaster which turned out to be a blessing in disguise; each time I opened a shot and edited it, GIMP was compressing the JPEG a little further, until I ended up with some really weird and pixelated results which I only happened to notice on close inspection the day I was supposed to hand the shots over. I had to redo them all from scratch - but it was a good thing really, because I had overcooked the shots a little bit, and second time around I went a little easier, just let the mother's beauty show through with less editing, and I was much happier with the results.

-----

In other news, I did another gig shoot for Goldrush Radio where the lighting was terrible and I wasn't as happy with this set as the previous:

22/365

Still, the guys liked them enough to ask me to do a promo shoot with them. This will again test my creativity as I have no idea how to do this sort of thing without it coming out cheesy. Much input from the band will be needed.

In between all that I've been shooting some more nature shots, mostly because I find them easy and fun and very relaxing. Cliché I know but I am still able to use this type of shooting as a learning experience. For example:

30/365

Ah, I love love love this shot. The light, the colour, the bokeh... The sun was just setting and the light was such a beautiful colour; I was lucky enough to chance upon these blooms coming out of someone's garden so I took a few shots of them from different angles and this one really captures the scene I saw. Taking light into account in composition is not something I'd considered that much because in the past couple of months, due to the time of year the light has always been pretty much the same. Now I can see what the spring/summer evenings have to offer and again, it has given me something else to think about.

One area I am struggling with is my 365 Project. A 365 is, simply put, a project where you have a shot for each day of the year (preferably taken on the day in question). For the first three weeks it was a piece of cake to pick up my camera every day and get something a little different each time, but the past ten days or so have proven a little trickier. It's not that I have no opportunity to shoot, but more that I have no idea how to be original every single day. So yeah, between you and me I have cheated a little bit; missing a couple of days then uploading a few from the same day and changing the date stamp. It's hard, man! Although on reflection I'm surprised I only have four flower shots in the whole collection thus far.

The hardest part is getting out and about. There's only so much random crap in my home that I can take extreme DOF shots of. But out in the world there is no end of opportunity as long as you keep your eyes open:

Moo

MOO.

Happy snapping, darlings.

Jargon: The Exposure Triangle Part III -- ISO.

0 comments
Ugh, totally lazy late update from me. Believe it or not I've been so caught up in actual photography I've had no time to blog about it. :)

So far I've described how aperture and shutter speed can control the amount of light that falls onto your camera's sensor. ISO is more about light sensitivity. In the old film days you would have to buy different types of film for indoor or outdoor shooting; the indoor film would have a higher sensitivity to light, meaning it was able to detect it better.

These days with the nifty DSLRs we have, we have more control over what ISO setting we use, as well as being able to ramp it up to much, much higher than was available in the past.

The lowest ISO setting available on most DSLRs is ISO100. This setting pretty much allows us to control the exposure of the shot purely using aperture and shutter speed. If you're in a position to shoot in darker conditions and allow for increased shutter speed (i.e. through use of a tripod) then the lower ISO is still the way to go, to maintain the integrity of the shot. However if you find yourself in a dark condition with nothing but your hands to stabilise the image, bumping up the ISO can allow you to keep your shutter speed relatively fast - noise is always preferable to blur, and some editing software even comes with a noise reduction feature which can help.

In the below pic I was in a fairly crowded bar with no choice but to ramp up the ISO to keep the shutter speed fast enough to reduce blur. In this instance it actually works really well, giving the shot a gritty, "rock star" edge to it:

16/365

Of all the settings I use, this is the one I always, without fail, forget to set back if I then shoot in brighter conditions. If you look closer at the sky you can see what I mean:

DSC00288

Blech, I hate looking at shots from when I first started.

So there you go. Higher ISO can enable shorter shutter speeds but compromises the quality of the shot with digital noise.

Thus concludes my crappy explanations of the exposure triangle!

Monday 5 April 2010

Updates - the Nifty Fifty.

0 comments
I'm working on a post explaining the last part of the exposure triangle (ISO) but I've hit a wall with it, in that I understand what it does and when to use it, but am struggling to explain it in an understandable way. So bear with me on that. :)

In other news, I received a new lens the other week - a 50mm f/1.8 portrait lens, otherwise known as the "Nifty Fifty". It has a fixed focal length, meaning no zooming in or out, but I really haven't found that to be much of an issue, and at 50mm it's roughly close to the focal length of the human eye, meaning that what you see through the viewfinder should be more or less the same magnification as what you see normally. This lens has a ton of practical applications and really hasn't been off my camera since I got it.

First off, the wide maximum aperture allows for some seriously shallow depth of field. While I'm already sensing my skill improving past the "bokeh-whore" stage, I do love bokeh, and opening that aperture right up allows me to capture some really great shots.

Promise of Spring

What I have learnt though, is that opening the aperture up to its widest at f/1.8 is inadvisable if you are doing close-ups and your subject might move even the slightest amount, e.g. a flower in a breeze. The DOF is so, so shallow that movement of the subject will throw it outside of that narrow focus area:

Ickle Bud

What's happened in the above shot (f/2.2) is that the breeze blew slightly and I ended up with the little leaves cupping the bud being totally focused, and the bud itself slightly out.

As I've used the lens more and learned about its strengths and weaknesses, it really has proved itself as a marvellous bit of glass. When I have used it for its intended purpose (portraits) the results have really been stunning.

12/365

Just look at that little sweetheart. Doesn't his face just make you "aww"? Look at the little water droplets in his beard! Is that water or drool?!

This shot was taken the first day I had the lens, and I went mad with the wide aperture (that shot is f/1.8). The result is that, even at 6pm on a pre-Spring evening, there is enough light coming into the camera for the shutter speed to speed up and capture him crisply before he moved. Unfortunately though, the focus is roughly at the bridge of his nose, and due to the insanely shallow DOF, his eyes are ever so slightly out. If I had stopped the aperture down to about f/2.5 his whole face would have been tack sharp, and in fact reviews I have read say this particular lens performs at its best when stopped down to f/2.5 - f/2.8. Either way I am very happy with that shot.

The other most impressive use of the lens so far was when I went to see my friend's band play the other night; I took my camera to experiment with the sort of candid photography a gig atmosphere provides and when Dan spotted it he asked if I would try and get some shots of the band. I played the whole thing down a little (I'd never shot in such dark conditions before, am a total amateur, didn't want them to anticipate any really good shots) but I was really, really happy with the results.

DSC02443 16/365 DSC02552 DSC02533

I opened the aperture up all the way (f/1.8) but because I wasn't right on top of the guys, the shallow DOF was less pronounced. This meant I was letting in the maximum amount of light possible. I also had to bump up the ISO (light sensitivity -- will explain this more when I get rounf to finishing the jargon post!) to 1600 which is very, very high and resulted in a lot of digital noise (or graininess) on the shots. However in doing so I was able to speed up the shutter speed to about 1/25 sec, and avoid the guys just being artsy blurs as they performed. Grain is always preferable to blur -- it can be fixed, to an extent, in some processing software, and also for the black-and-white shots it added a really gritty, "live" feel which I think added to the shots.

Speaking of black-and-white... my researching on the best way to turn a picture from colour into B&W has generally led me to believe that a) don't use your camera's B&W function as you then have much less control over the highlights in post-processing; and b) use the Channel Mixer instead of just desaturating as it means you have control over the highlights, luminosity and tones. I will cover B&W post-processing in more depth in the future, but the gig shoot has helped me to learn a lot more about how to do this successfully. Most of the B&W shots in that gig set were done because the real light was so red or unflattering; the Channel Mixer enabled me to turn the light into something more natural-looking.

Overall I am beyond happy with the 50mm lens. The band were so chuffed with the shots that they have asked me to do some staged promos. Also another friend whose girlfriend is very heavily pregnant has asked me if I would do some artsy bump shots before she drops -- the prospect of this is a little daunting but I'm going to do it; if it goes wrong at least it's just my friends and not someone who is paying me!

Erk...